Proxmox VE Storage
All docs related to Proxmox VE Storage KBs.
[How-To] Create and Manage ISCSI Storage on Proxmox VE
Purpose
This How-To will guide you in creating and managing your ISCSI storage in the Proxmox Virtual Environment.
Prerequisites
List of prerequisites:
- Proxmox VE Node (Minimum 1)
- Root Credentials to Proxmox VE Node
- ISCSI LUN created on a remote storage target
Adding ISCSI Storage in Proxmox VE
Step 1: Add the ISCSI Storage in Web UI
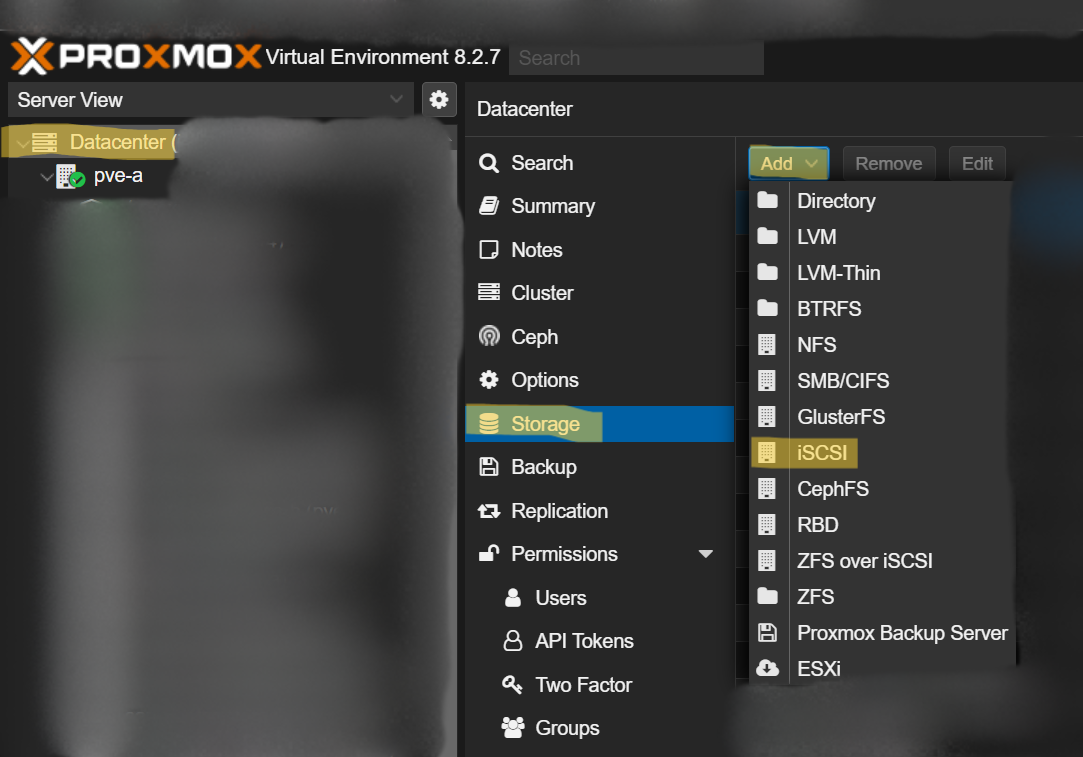
The first step is to add the storage iscsi lun in the proxmox web UI. This step assumes you already have the ISCSI lun created, target created, and available/allowed network-wise to get to the proxmox node. Login to proxmox and go to datacenter, storage. Then click add, ISCSI.
Within the Add ISCSI Storage window, give your iscsi storage a name in the ID: field. Then, enter the DNS or IP name of the target the ISCSI storage is available on. Then, use the drop-down list to select the correct target. Leave all nodes selected by default and leave enable checked. Make sure to un check Use LUNs directly.
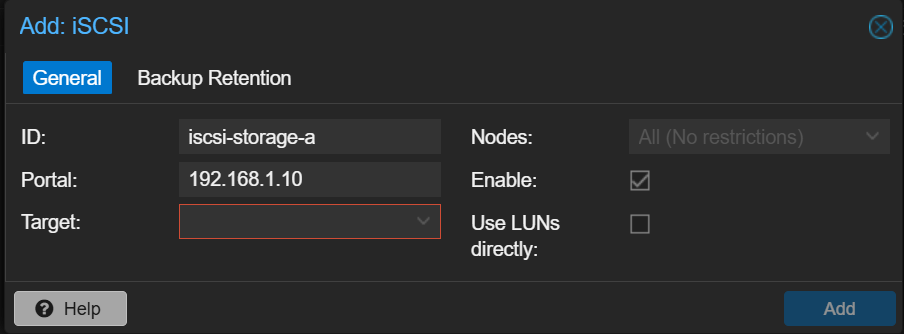
Checking "Use LUNs directly:" will allow vms disk images to be placed directly on the raw lun storage. This is not sharable to more than 1 PVE node. Unless you have a specific use case, the best practice is to not check this and create LVM with LUN.
Once you have this ready, click Add. This will map the ISCSI storage to each PVE node you have in the cluster. You may notice that the storage shows up as not active or with a "?" next to it on some nodes. You just need to rediscover it. Run this command on the affected nodes shell, the IP address being the IP of the ISCSI storage target:
iscsiadm -m discovery -t sendtargets -p 192.168.1.10Once you've done this, it should be available on the PVE node. You can verify with this command:
iscsiadm -m sessionOnce your storage has shown up and is working on all PVE nodes, you can move to the next step.
Step 2: Create an LVM on Raw LUN Space
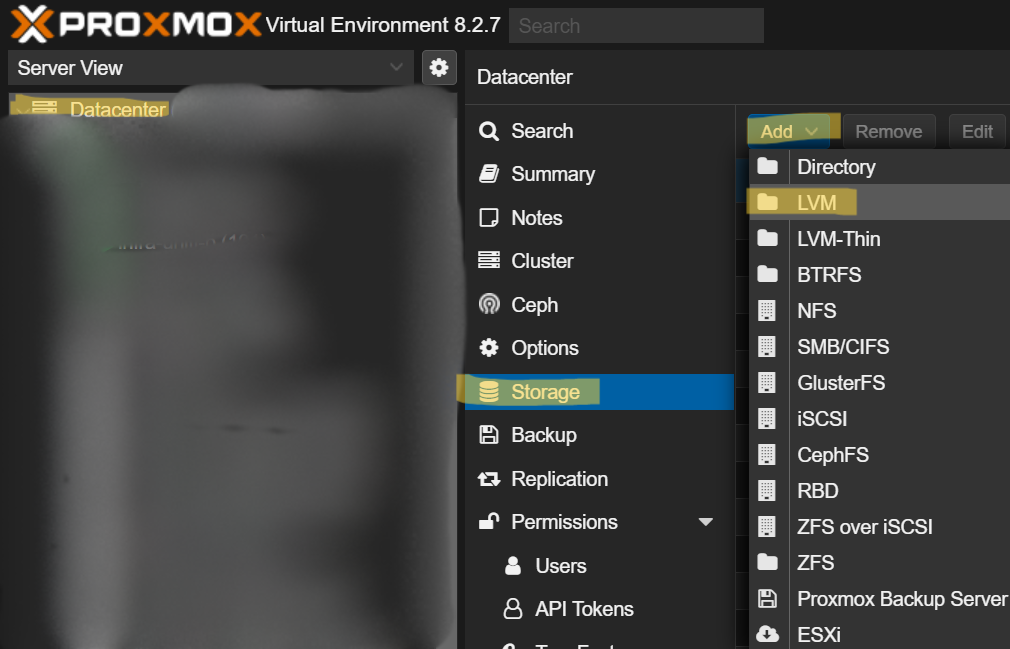
Now that your ISCSI storage is available on all PVE nodes, you need to make it usable for VMs/LXCs. The easiest way to do this is to create an LVM on the raw LUN space. To do this, again go to Datacenter, storage. Then, add, LVM.
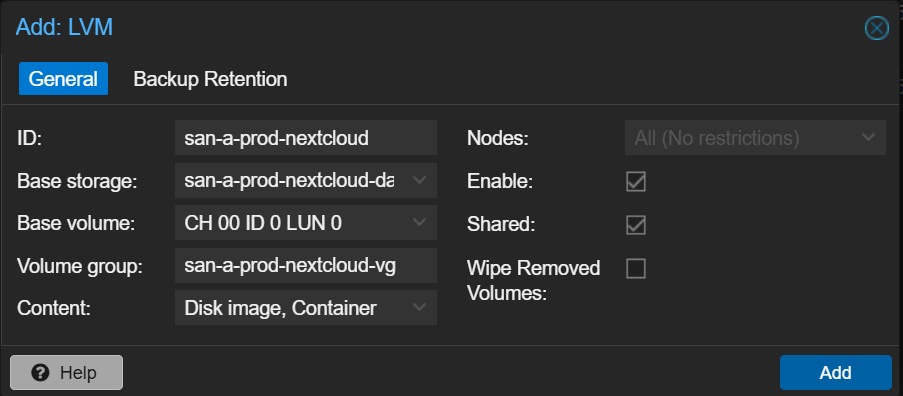
Once you are in the Add LVM window, give your ISCSI-backed LVM a name in the ID: field. Then, select the ISCSI storage as the Base storage. In the base volume, select the raw LUN storage on the ISCSI target. In Volume group, give a name. I usually follow what I set for the ID and add -vg to keep it simple. Select what content you want available, leave all nodes default selected, leave enable selected, check shared, and leave wipe not selected.
Once finished, select Add. This will add the LVM to all PVE nodes. If you see it show up as available storage to some nodes but inactive or with a "?" next to it for others, run this command on the inactive nodes shell:
vgcfgrestore new-volume-groupReplace new-volume-group with the actual name of your new volume group from above. This should resolve the issues. With storage available on all nodes, you should be finished. Now you can begin to move VMs and LXCs to the new storage over ISCSI. This will allow you to migrate between PVE nodes without changing storage.
Removing ISCSI Storage in Proxmox VE
Step 1: Remove the ISCSI Storage in Web UI
The first step is to remove both the lvm and the iscsi device in the us at the data center level.
Step 2: Remove the ISCSI Storage in Shell on each host
Run the following on each host to discovery/locate the desired iscsi lun to be deleted:
iscsiadm -m sessionThen, run the following on each host shell, inserting the name of the IQN from the last command for the iscsi lun you want deleted:
iscsiadm -m node -T iqn.2005-10.org.freenas.ctl:test-storage -uAfter this, run the first command again to verify it isn't there. Then move onto the next host until completed.
[How-To] Passthrough Hard Drive to VM
Purpose
The goal of this how to will be to demonstrate how to passthrough a hard drive, ssd, or nvm drive to a vm directly.
Prerequisites
List of prerequisites:
- admin pve user
- vm in pve
- unused and unformatted drives in pve
Instructions
Step 1: Gather Information About the Drives
First, we need to gather the needed information about the drives so we can structure our command to passthrough the drives to the VM. Start by running the following command on pve shell:
apt install lshwThis will install the lshw app that will allow you to better see your hard drives. Then, run this command:
lshw -class disk -class storageThis will list all disks by class and give you detailed information about them. We won't use anything from this results to passthrough the drives as that is possible to change. But we will use it to find the by-id disk in next command. Save the output and parse manually to find the sections where the drives you want to passthrough are at. Now, run the following command:
ls -l /dev/disk/by-id/This will list all disks by-id which is how we are going to pass them through as these IDs are specific to each disk and will never change. Now, match information about your disk from the first command to the disks in the second command. Take the by-id name of the disks you want to passthrough from the second command and put them in a list.
Step 2: Prepare Passthrough Commands
Now that we have our by-id disk names, we are ready to insert them into the command template below. Do this and put them commands in a list for each drive you wish to passthrough:
qm set 100 -scsi5 /dev/disk/by-id/ata-xxxxxxxxx-xxxxx_xxxThe number after scsi can be anything greater than 1, but can not be repeated. So if you passthrough more than one disk, start at 2 and go up for each disk from there. Then, where you see ata-xxx, replace all of that with your by-id disk name.
Step 3: Execute Commands
Next, we are ready to passthrough the drives. Simply run the commands you built one by one in pve shell. Once completed, browse to the vm's hardware tab in the pve web ui and verify they showed up. Then, boot the vm up and see if it actually worked.